The XPS file format was developed by Microsoft as opposed to the PDF file format. It is quite possible that many of you have encountered an XPS file that cannot be used, or even opened. For those who wish to create or use XPS documents, this post may prove useful for understanding what XPS is, what XPS Viewer is, and how to use it.
Table of Contents
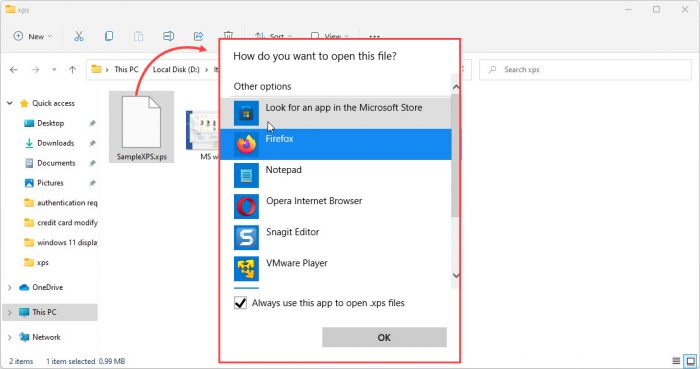
You may have tried using an XML file, but are unable to open it since your operating system does not find a supporting application, and may see something like this: Windows looking for an application to open XPS file
Allow us to shed some light on what XPS is all about.
XPS stands for XML Paper Specification. Microsoft developed this format in order to compete with Portable Document Format (PDF). However, it was not as popular as expected. The XML documents can contain regular text as well as additional information about the content, such as its layout and appearance.
The purpose behind the creation of XPS was to eliminate the use of paper in an attempt by Microsoft to go green.
An XPS file may have an extension .xps or .oxps (OpenXPS).
XPS Viewer is a free-to-use application by Microsoft for using and viewing XPS files and documents. It used to come preinstalled with Windows 10 up until version 1803 was released. Since it was not in demand, it was given as an optional application that users can install manually when and if required.
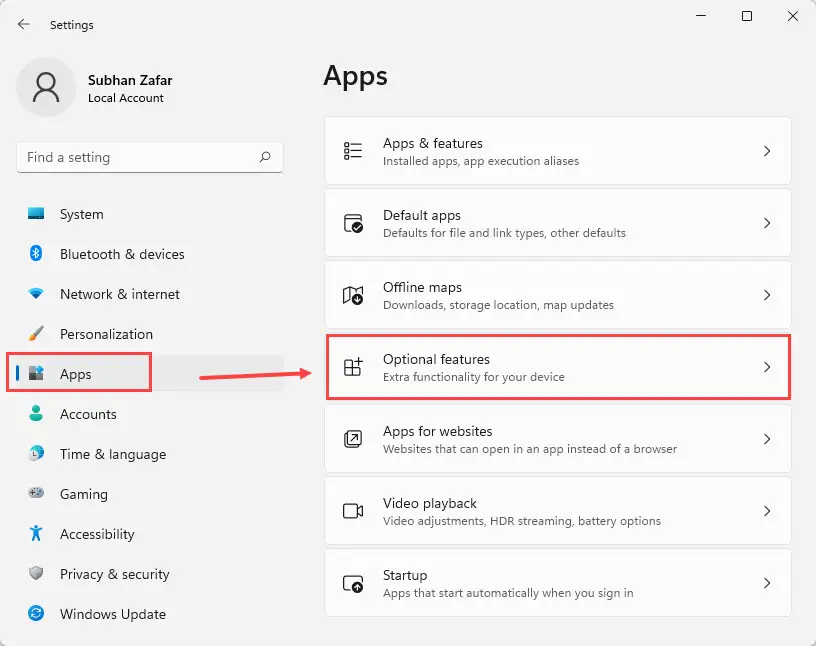
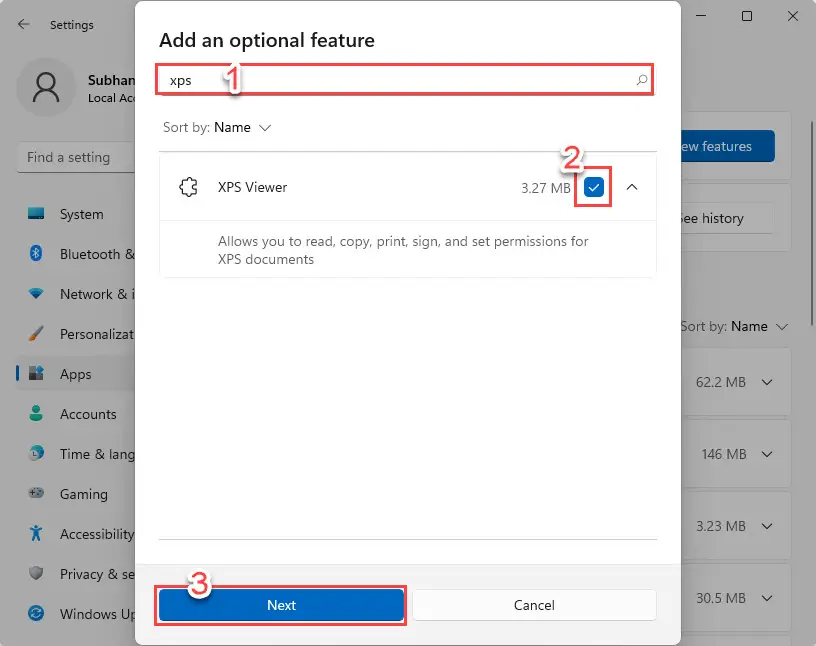
Installing the XPS Viewer on Windows 11 and 10 is pretty much the same; some layouts may be a bit different.
Here is how you can install XPS Viewer on Windows 11:

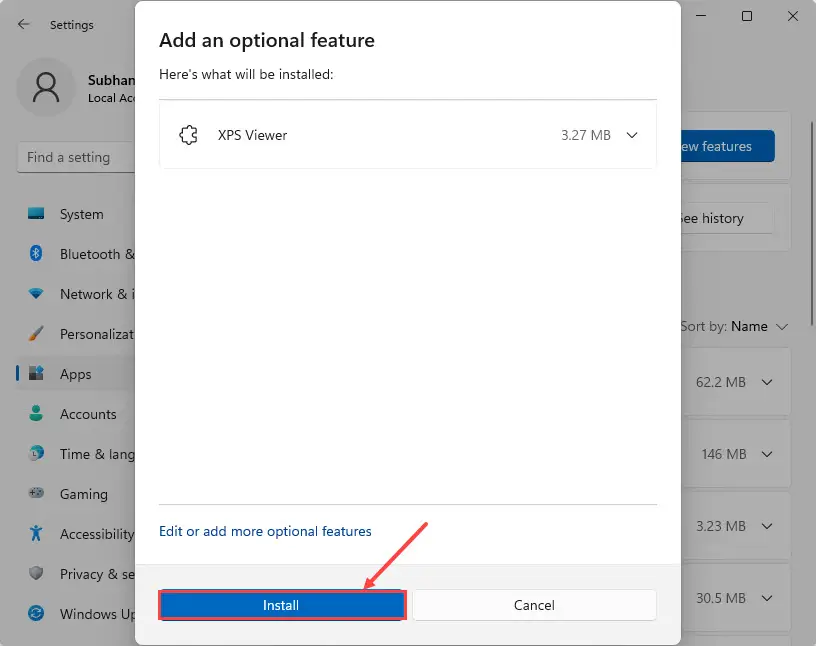
You have now successfully installed XPS Viewer.
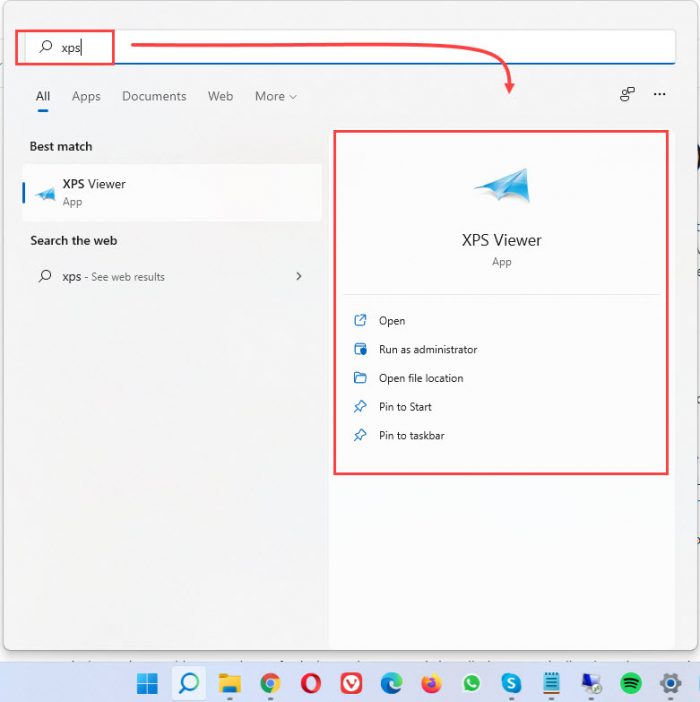
You can launch the application by searching for it in Windows Search, or the Start menu. Start Menu search for XPS Viewer
Alternatively, you can also type in xpsrchvw in Run or Command Prompt to launch XPS Viewer.
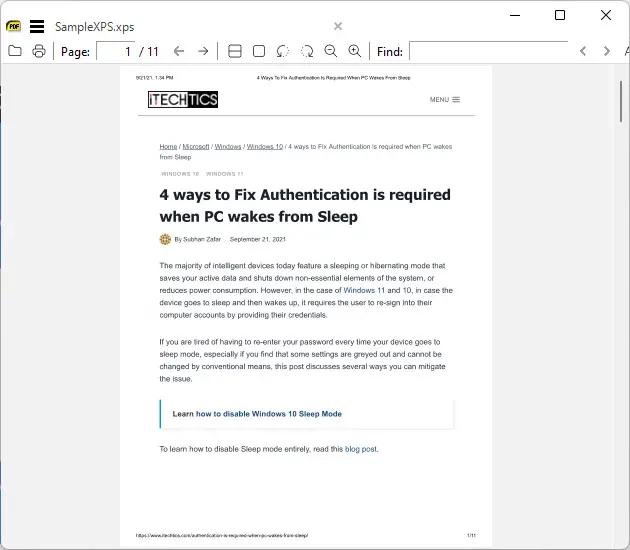
To open an XPS document, click on File from the top menu in the XPS Viewer, and click Open. You can then browse the saved XPS file and select it to open it in XPS Viewer.
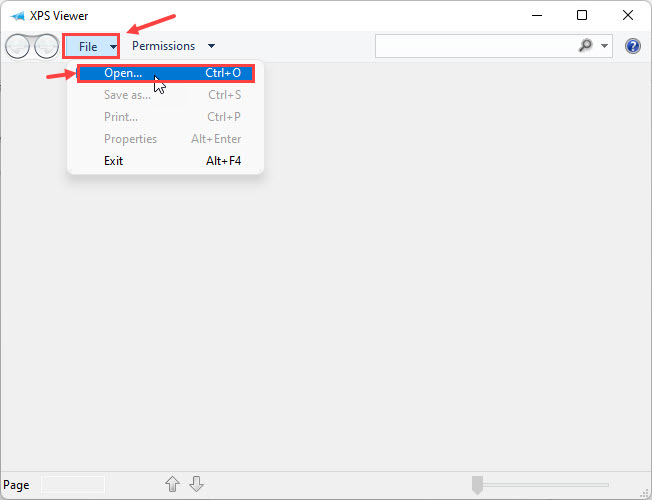
Open an XPS file in XPS Viewer
Once a document is open, you can then save its copies, or change its permissions by clicking on the Permissions menu from the top, and then clicking Set permissions.
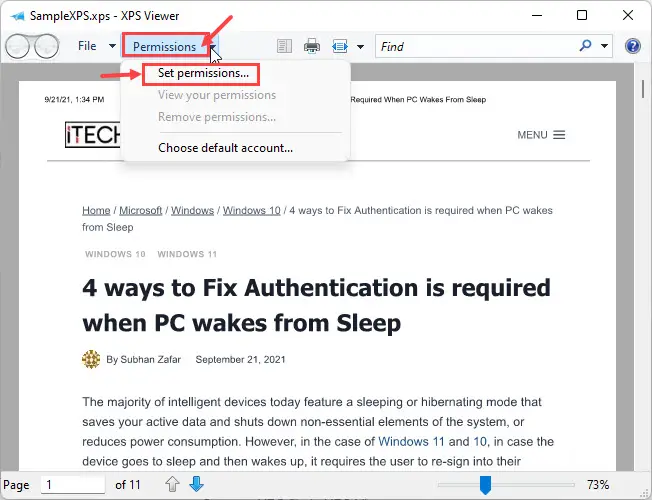
Modify file permissions in XPS Viewer
You can also convert an XPS file to PDF format. To do so, simply click on the Print button at the top of the app, and then select Print to PDF. Click OK to save the document as a PDF file.
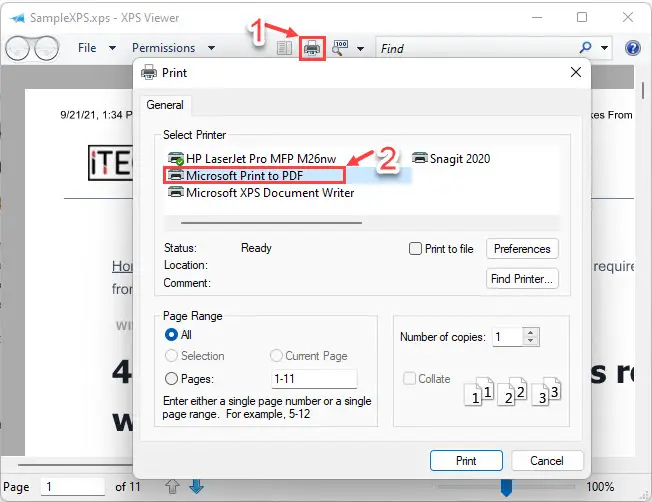
XPS to PDF
Since XPS Viewer is a tiny application, it cannot do much of anything else, except for what we have already discussed.
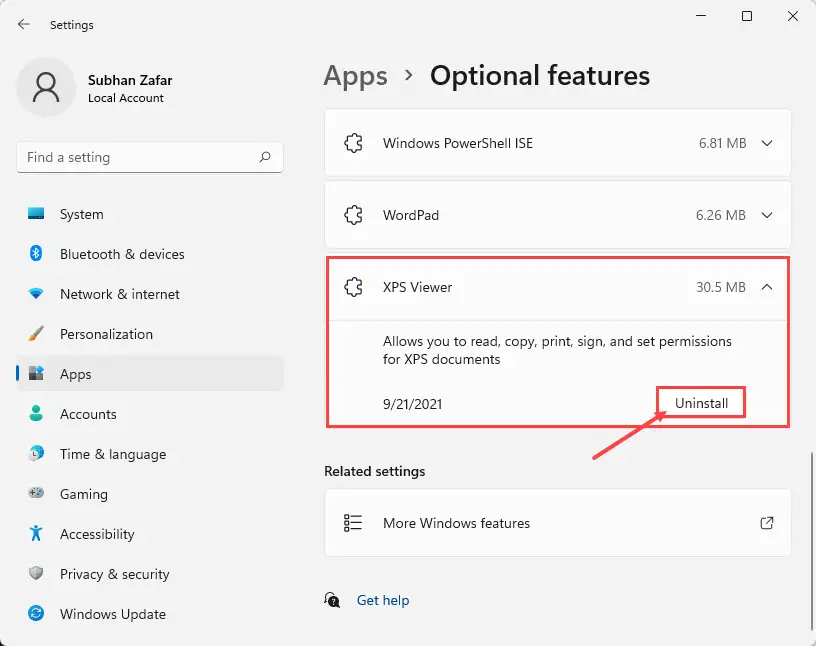
If you are no longer in need of the XPS Viewer, you can just as easily remove it from your computer. Here is how:
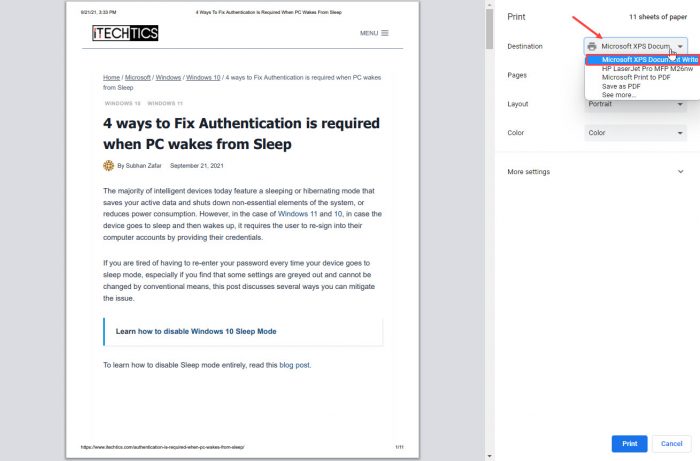
Microsoft XPS Document Writer is another hidden gem in both Windows 11 and 10. Similar to the method of creating a PDF document while printing and selecting the option Print to PDF, MXDW provides the same option, but for XPS. Print to XPS
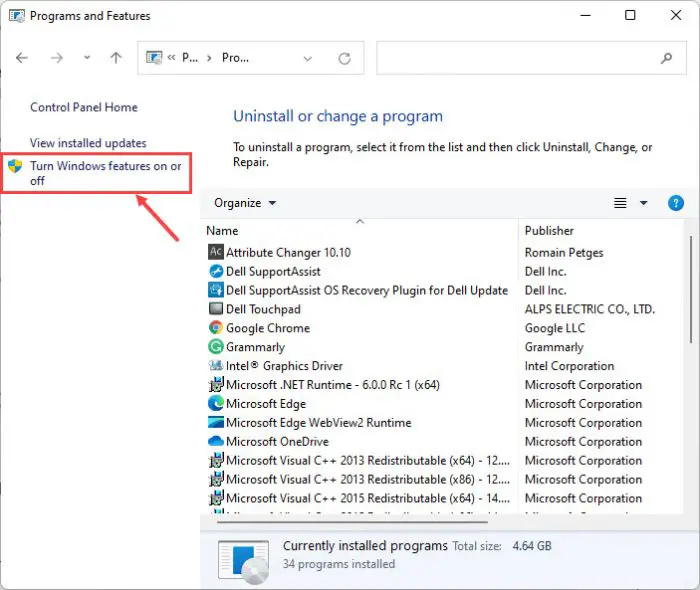
This feature has to be enabled manually through Optional Features. To do so, type in appwiz.cpl in Run, and then click Turn Windows features on or off on the left. Turn Windows features on or off
In the pop-up window, scroll down and check the box next to “Microsoft XPS Document Writer,” then click Ok.
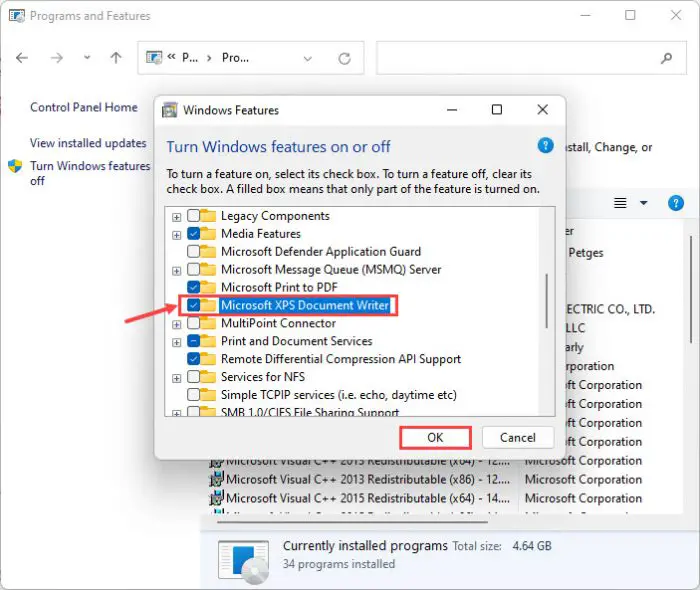
Turn on MXDW
MXDW will now be installed in a few seconds. You should now be able to see the option to Print to XPS on the print pages, which you can select to save files in .xps format.
In case you8 ever feel like turning off the feature, simply uncheck the box next to “Microsoft XPS Document Writer” on the Windows Features page.
There are other methods available on the internet that can be used instead of XPS Viewer. Some are applications that can be installed, whilst others provide an online web view.
GroupDocs is a quick and free online tool to help you view your XPS and OXPS files. All that is required is for you to drag and drop your file, and it will convert and display it for you.
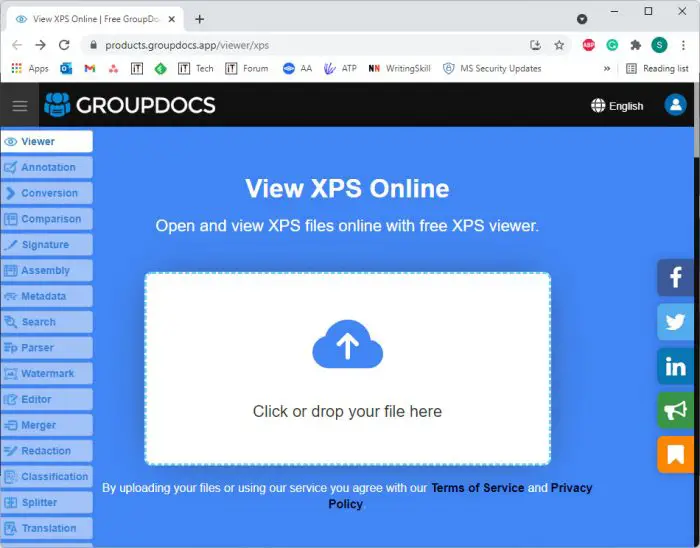
To use GroupDocs, open their webpage in any browser and simply drop your file over the given area. GroupDocs
SumatraPDF is a downloadable application that can be used to view almost any document. This includes .xps, .oxps, and .pdf.
SumatraPDF
Google Drive is an excellent tool as it also supports XPS formatting. All you need to do is upload the file to Google Drive and you can then view it easily.
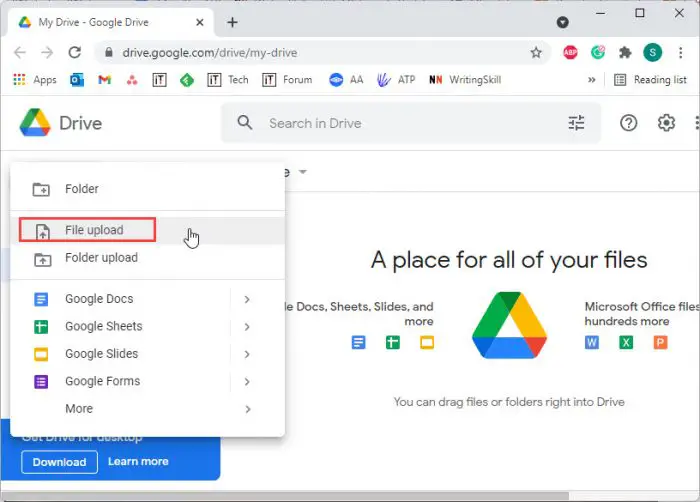
Open Google Drive, click New, and then click File Upload from the drop-down menu. Google Drive upload
Now browse to upload the XPS file. Once uploaded, click on it to view it within the browser directly from Google Drive.
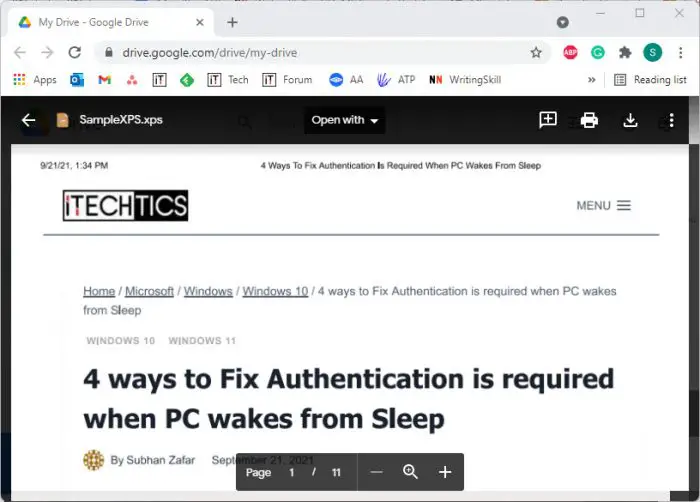
XPS document opened from Google Drive
Not many people use the XPS format anymore. However, there can be certain scenarios where you already have an XPS document but have no idea how to access its content.
We hope that this blog post helps you understand everything there is to know about XPS and its associated applications.